Software Synth Mistakes
5 Mistakes To Avoid When Using MIDI & Virtual Instruments
Joe Albano on Apr 26, 2016
MIDI and Virtual Instruments have been around so long now that we probably take them for granted, especially when it comes to the increasingly sophisticated software-based virtual instruments (VIs) that are used in so much music making. This technology has long since come of age, and newer users don’t really have to think about the mechanics of it, like we had to in the early days of DIN cables and MIDI channelizing. But despite the ease of use provided by virtual synths & samplers in today’s DAWs, there are still any number of under-the-hood technical issues that can get in the way of achieving the most expressive sound and performance. Here are 5 common mistakes that people often make when using MIDI and VIs, that can stand in the way of the most musical application of these creative tools.
Velocity
Velocity, of course, is MIDI-speak for how hard or soft you play. It’s part of every MIDI note message, registering how fast or slow—and therefore how hard or soft—keys are struck. What’s done with this data is entirely up to each particular VI, but 999 times out of 1000, it’s mapped to three things—volume, tone, and attack. Hard-played notes are louder, brighter, and have sharper attack transients (at least percussive instruments like drums piano, guitar, etc). Virtual instruments—synths and samplers—have two ways to accomplish this: They can use Subtractive Synthesis components—like Lowpass Filters and ADSRs—to make the Instrument respond musically and expressively to the Velocity generated by the performer. Or, in the case of most Sampled VIs, the sound designer can record samples at multiple dynamic levels, and map them to respond to notes at different Velocities, so the level, tone, & attack change in performance as they would with the real (original) instrument being emulated.
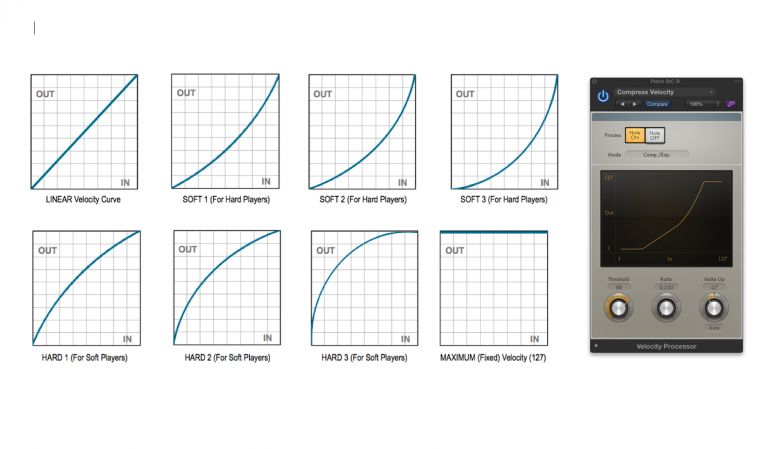
And Velocity makes this expressiveness possible—but it can also turn around and bite you in the ass! Every Controller keyboard (and drum pad) generates 127 levels of Velocity, in response to the musical/dynamic performance, but that doesn’t mean that every controller generates this data the same way. Between the minimum (1) and maximum (127) values, the Velocity levels in-between may smoothly span all values, or, as often as not, they may be less even in response. This is the Velocity curve of a particular controller—how it responds to the performer’s range of dynamics—and if that response is not as even as it should be, the virtual instrument may not always receive Velocity data that ideally corresponds to the player’s touch. This can result in an odd dynamic response, that makes the player sound like he/she has sloppy technique, when in fact it’s just a bad Velocity match of player-to-keyboard-to-VI.
The most common mistake a player can make is using a keyboard that’s either too hard or too soft in its Velocity response. If the keyboard is too hard, the player will have trouble reaching the higher Velocities, and the Instrument may sound like it’s being played too tentatively, for a seemingly lackluster performance. If the keyboard’s too soft, then no matter how quietly the performer tries to play, everything will come out close to full Velocity/full volume, making even the most nuanced player sound like a pounder, with no subtlety.
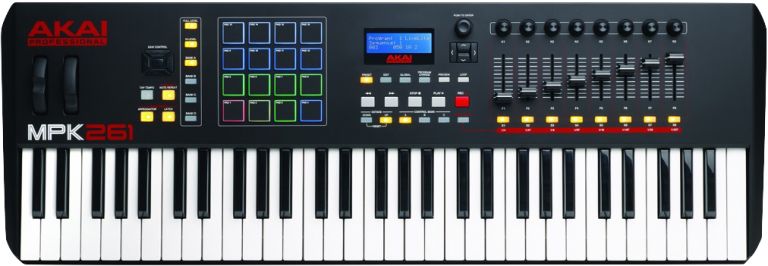
It’s up to the player to do two things to avoid these problems. First, choose a MIDI keyboard with a suitable action—weighted or unweighted, depending on playing style. And then test out the Velocity response between minimum and maximum—the Velocity curve—to make sure that Virtual Instruments are responding evenly, with their full-range of dynamic variation. If necessary, the curve can be adjusted, either on the controller itself, or via MIDI plug-ins in the DAW.
Don’t Take Your Hand Off the Wheel(s)
One of the traditional limitations of MIDI has always been its somewhat keyboard-centric design—much better for playing percussive instruments than legato ones (like winds, brass, strings). But there are always at least two—and sometimes many more—wheels (and pedals and sliders) available that can be mapped to control other aspects of musical expression (that are not covered by Velocity)—this is MIDI CC (Control Change, or Continuous Controller) data. To add vibrato or tremolo (like strings and winds), to swell the volume and tone of held notes (like brass), and to add other pitch-related performance nuances, (like bends, sliding/gliding between notes, or legato playing), the standard Modwheel and Pitch Bend wheels are often augmented with additional pedals and sliders, which can generate continuous streams of CC data to control multiple aspects of the Virtual Instrument’s sound and response in real time.
The more sophisticated VIs often come with different types of MIDI CC’s already mapped to control various aspects of the Instrument’s expressive response. But many people never take the time to really explore these possibilities, and that’s a mistake bordering on a MIDI tragedy! I’ve often heard a VI played stiffly—like an organ—when I knew that if the player had taken the time to learn about and practice with the various controllers available to him in each patch, he’d have coaxed much more musical, expressive performances out of that same Instrument.
Don’t be Afraid to Lean in (Aftertouch, the forgotten MIDI message)
Besides wheels & pedals, some keyboards have another option for expressiveness—Aftertouch, a.k.a. Pressure. This is a sensor strip under the keybed, running the length of the keyboard. After a note is played (at whatever Velocity), the player can press down further on the key, and generate a continuous stream of Aftertouch, or Pressure, data, which can, just like CC data, be mapped to control various aspects of the Instrument’s sound. Typical applications are volume swells, vibrato, and tone (pressing adds brightness). Unlike wheels & pedals, this data can be generated with the same hand playing the notes, freeing up the other hand (and feet) for manipulating additional expression controllers.
Unfortunately, it’s typically the more expensive keyboards that include Aftertouch, and many sounds don’t do anything in response to it, so a lot of players don’t bother with it, even going so far as to disable it, to avoid accidentally triggering some unexpected change or effect during hard playing. But it’s easy to quickly reprogram a patch to take advantage of this feature, if available, and it would be a mistake to write it off too quickly.
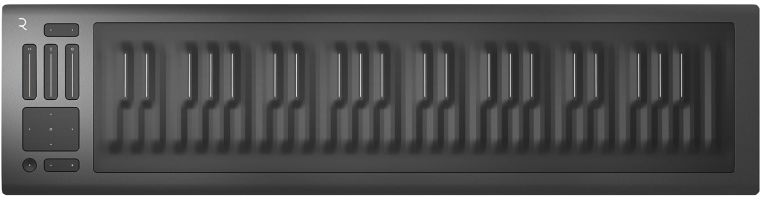
In fact, the latest and greatest controllers have incorporated various new technologies in their playing surfaces for generating various CC and Aftertouch data with the same hand(s) playing the notes, which can, with a little practice, provide a much more expressive performance experience, with VIs that have been set up for them. Take a look at the offerings from companies like Roli and Linn, to explore the cutting edge of MIDI expression.
Don’t Ignore the Bottom of the Keyboard
Players with keyboards that are shorter than the full 88-key piano length may be missing out on a substantial number of Virtual Instrument variations, that often come with each patch but are only accessible from the lowest octave of keys on an 88-note keyboard. High-end Samplers often include multiple Articulations with an Instrument, when appropriate, to allow for emulation of the different playing styles of the original. The most common example is strings—a “String” patch might include, besides basic Legato samples, hidden options for Staccato, Tremolo, Pizzicato, and even Trills, but you’d never know it if you didn’t explore the patch (or read the manual!) Often the only way to get at these is to use the lowest octave of keys on an 88-note keyboard, which are typically repurposed as keyswitches, to select among the various Articulation options a VI might have to offer.
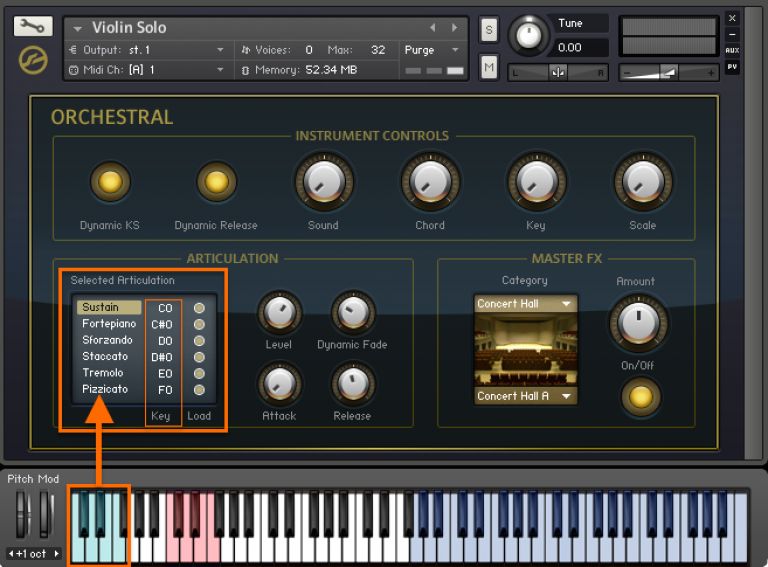
The mistake many players make is to not test out suitable Instruments, to see what hidden treasures might be lurking. Even if you have a shorter keyboard, most 25/49/61-note keyboards have octave transpose switches that, while not as convenient for real-time playing as a full 88, would at least let you access the MIDI note values of that lowest octave, to discover any additional Articulations you might be missing out on.
Don’t Quantize Out of Habit
Some players would rather be raked over the coals rather than Quantize their MIDI performances, but others—especially those for whom keyboard is not their main instrument—wouldn’t want to leave home without it. I’ve often had people ask if there was any way to have Quantizing work in real time, as they played (and the answer is no, not fully, despite what some software may suggest!). But—just like with AutoTuning—it could be a mistake to become over-reliant on Quantizing, no matter what level of keyboard prowess you may (or may not) possess.
While Quantizing can undeniably be useful, it can also rob a performance of musical style. Many drummers, for example, are known for pushing or laying back into the beat, and if such a performance was 100% Quantized, their unique feel would be lost. Even if your keyboard (or drum machine, or drum pad) chops really aren’t quite up to snuff, I would still recommend not automatically applying Quantization as soon as the part is down. As painful as it may be, take the time to listen to what you’ve got—even a really sloppy performance may have a desirable groove to it, some “feel” that’s worth preserving.
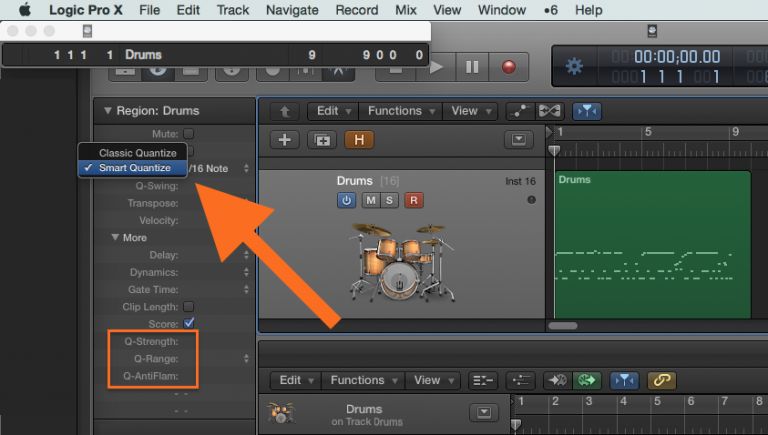
Then, if you decide Quantizing is in order, it’s worth exploring Partial Quantization. That’s where the notes are moved only part of the way to the nearest musical gridlines (how tight this is will be a user setting). Instead of creating robotically perfect timing, this can preserve some of the player’s musical feel, even while correcting the worst bits of a performance that’s too loose to stand on its own. Some DAWs have gotten even better at this—Logic’s recent addition of “Smart Quantization” apparently utilizes a more selective algorithm, which cleans up sloppiness while preserving the kinds of musical gestures that are usually sacrificed when Quantizing, like flams, rushing into/out-of fills, and slight push-pull of the groove. As a longtime keyboard player, I usually avoid the big Q, but Smart Quantize really does do an excellent job, especially on drum parts tapped in from the keyboard in real time.
More MIDI...
Of course, there’s much more MIDI madness we could get into, but I’m out of room, so I’ll end it here. If, like me, you’ve gotten a bit too comfortable with MIDI and VIs, it might be a good time to step back and take a minute to explore some of the less-used options & features, and then check out some of the newest cutting-edge controllers, to get a renewed sense of the expressive possibilities of our old friend MIDI.